|
|
|
3/12/01
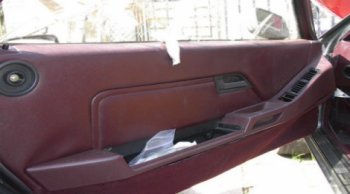
Door Panel
Removal :
(Tools Required) - 10mm wrench,10mm
socket w/ratchet,Phillips screwdriver, pocket knife
To remove the door panels you have to, and not necessarily in this order, take off the lock knob. To do this you will need to take you knife and pry out the center piece. Then use you screwdriver to take the screw out, and just wiggle it till it comes off. Then you must get the large round piece off by twisting it counterclockwise. Next you will have to take off the arm rest by opening it and removing the two 10mm screws inside of the compartment, also one other screw is located in the air tunnel in front. To get this one out you need to pry on the plastic piece and it will come loose. Then take the last screw out. Now to the last part, carefully go around and pry the door panel loose from the door. It is attached by small plastic holders that can easily break so be careful. Once that is done take the Phillips screw out of the wire harness that go's into the door then slide the panel forward and it should come loose. There are 2 sets of wires to remove, the speaker wires and the light wires. Now you should be done. This process should take about 10-15 minutes
| Preparation : | 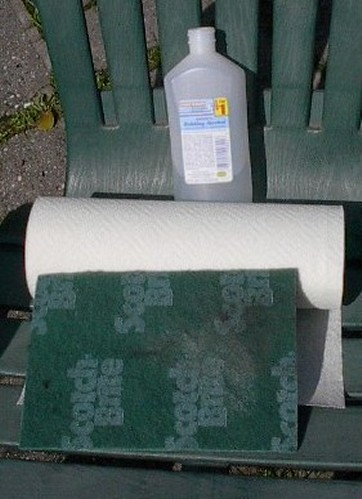 |
|
| (Tools Required) - Rubbing alcohol,green 3M scratch pad, paper towels | ||
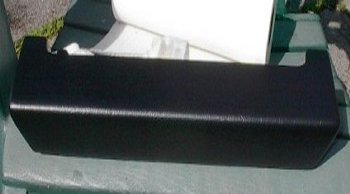
| Take your alcohol and wipe down the area to be dyed so that you get all the contaminates off of it. Then take your scotch brite pad and rough up the surface of your area. After that take your alcohol and clean it again. As for the product you use it application will vary. I went to my local body shop supplier and got a spray on dye. Use this type of product OUT of direct sunlight. It will cause it to mess up. Spray light coats allowing enough time for them to dry well before applying another one. I did about 20 coats on mine cause its a high traffic area and I don't want it to wear down. Allow a few hours to dry then reassemble. You should have an awesome looking door panel or whatever you dyed. | ||
 |
 |
|
 |
![]()